
ショコラ
Linux に PacketiXサーバーをインストールするには?
パケティックスサーバーをLinuxにインストールして、
Windows のクライアントを使って設定を行います。

もっさん先輩
手順
パケティックスサーバーを Linux にインストールして Windows のクライアントでアクセスするまでの手順。
- CentOS8 を立ち上げます。
docker run --rm -p 8888:443 -it centos:8- リポジトリを更新します。
sed -i 's/mirrorlist=/#mirrorlist=/; s/#baseurl=http:\/\/mirror/baseurl=http:\/\/vault/'\
/etc/yum.repos.d/CentOS-Linux-AppStream.repo /etc/yum.repos.d/CentOS-Linux-BaseOS.repo- PacketiX をコンパイルする為に、Development Tools をインストールします。
yum -y groupinstall "Development Tools" - PacketiX をダウンロードします。
curl -O https://www.packetix-download.com/files/packetix/v4.39-9772-beta-2022.04.26-tree/Linux/PacketiX_VPN_Server/64bit_-_Intel_x64_or_AMD64/vpnserver-v4.39-9772-beta-2022.04.26-linux-x64-64bit.tar.gz- ダウンロードしたファイルを展開します。
tar zxvf vpnserver-v4.39-9772-beta-2022.04.26-linux-x64-64bit.tar.gz# tar zxvf vpnserver-v4.39-9772-beta-2022.04.26-linux-x64-64bit.tar.gz
vpnserver/
vpnserver/Makefile
vpnserver/.install.sh
vpnserver/ReadMeFirst_License.txt
vpnserver/Authors.txt
vpnserver/ReadMeFirst_Important_Notices_ja.txt
vpnserver/ReadMeFirst_Important_Notices_en.txt
vpnserver/ReadMeFirst_Important_Notices_cn.txt
vpnserver/code/
vpnserver/code/vpnserver.a
vpnserver/code/vpncmd.a
vpnserver/lib/
vpnserver/lib/libcharset.a
vpnserver/lib/libcrypto.a
vpnserver/lib/libedit.a
vpnserver/lib/libiconv.a
vpnserver/lib/libintelaes.a
vpnserver/lib/libncurses.a
vpnserver/lib/libssl.a
vpnserver/lib/libz.a
vpnserver/lib/License.txt
vpnserver/hamcore.se2- 展開したディレクトリに入ります。
cd vpnserver- PacketiX を make します。
make--------------------------------------------------------------------
The preparation of PacketiX VPN Server is completed !
*** How to switch the display language of the PacketiX VPN Server Service ***
PacketiX VPN Server supports the following languages:
- Japanese
- English
- Simplified Chinese
You can choose your prefered language of PacketiX VPN Server at any time.
To switch the current language, open and edit the 'lang.config' file.
Note: the administrative password is not set on the VPN Server. Please set your own administrative password as soon as possible by vpncmd or the GUI manager.
*** How to start the PacketiX VPN Server Service ***
Please execute './vpnserver start' to run the PacketiX VPN Server Background Service.
And please execute './vpncmd' to run the PacketiX VPN Command-Line Utility to configure PacketiX VPN Server.
Of course, you can use the VPN Server Manager GUI Application for Windows on the other Windows PC in order to configure the PacketiX VPN Server remotely.
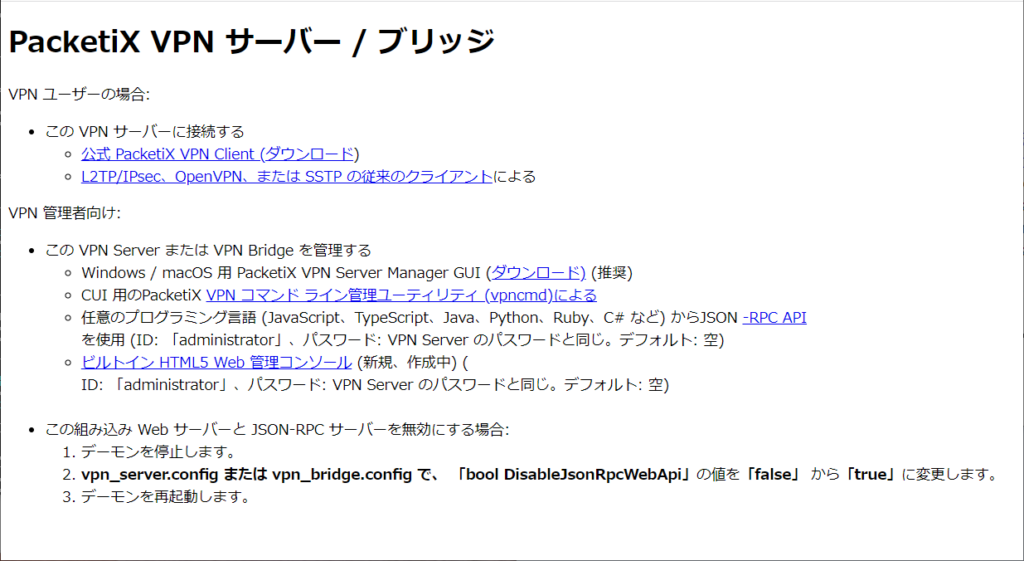
*** SoftEther VPN Server HTML5 Web Administration Console (NEW) ***
This VPN Server / Bridge has the built-in HTML5 Web Administration Console.
After you start the server daemon, you can open the HTML5 Web Administration Console is available at
https://127.0.0.1:8888/
or
https://ip_address_of_the_vpn_server:8888/
This HTML5 page is obviously under construction, and your HTML5 development contribution is very appreciated.
--------------------------------------------------------------------- PacketiX を開始します。
./vpnserver start# ./vpnserver start
The PacketiX VPN Server service has been started.
Let's get started by accessing to the following URL from your PC:
https://172.17.0.2:8888/
or
https://172.17.0.2/
Note: IP address may vary. Specify your server's IP address.
A TLS certificate warning will appear because the server uses self signed certificate by default. That is natural. Continue with ignoring the TLS warning.その後、https://172.17.0.2:8888/ にブラウザでアクセスしてみました。(元は英語。日本語に翻訳済み)
※ホストのIPアドレスでアクセスしてください。
- Windows のクライアントを使って設定を行いますので、
https://www.packetix-download.com/ja.aspx からソフトウェアをダウンロードします。
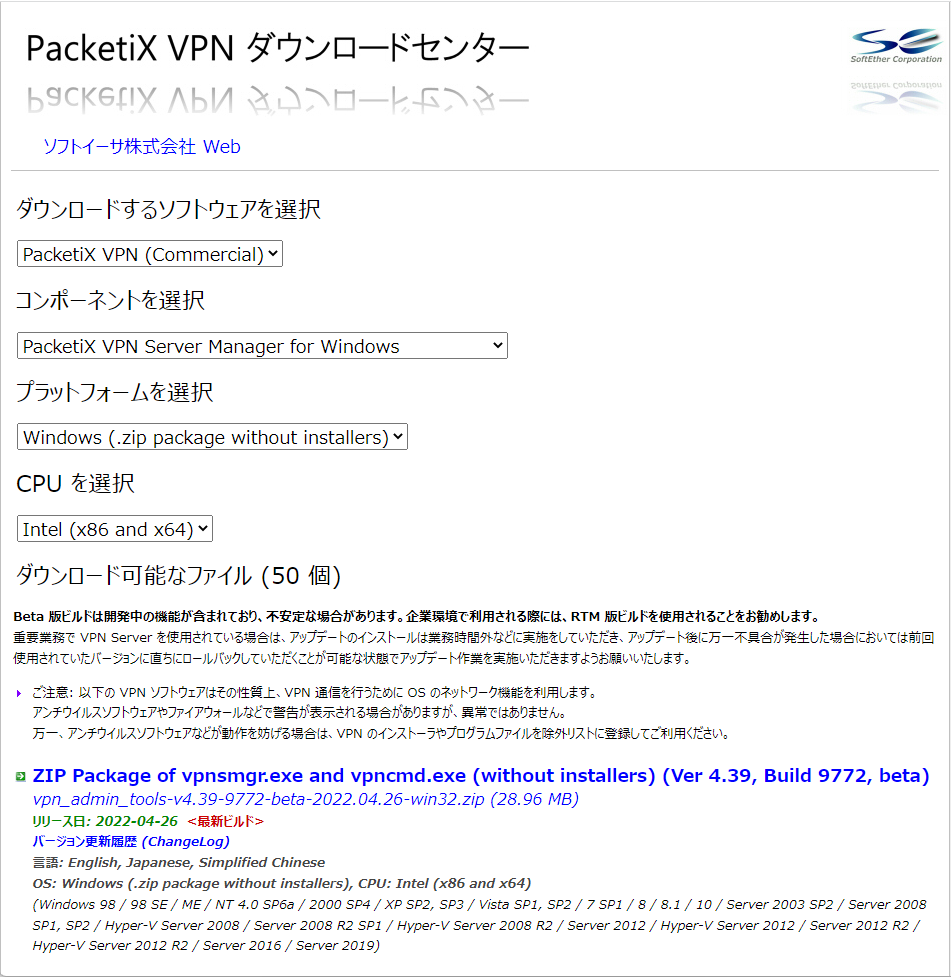
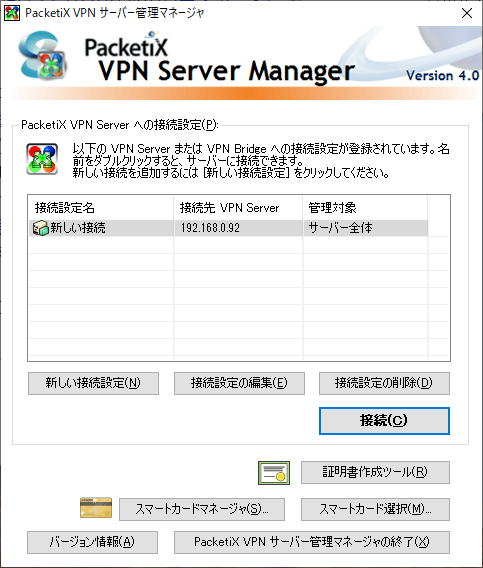
- zip を展開して、その中にある vpnsmgr.exe を実行したところです。
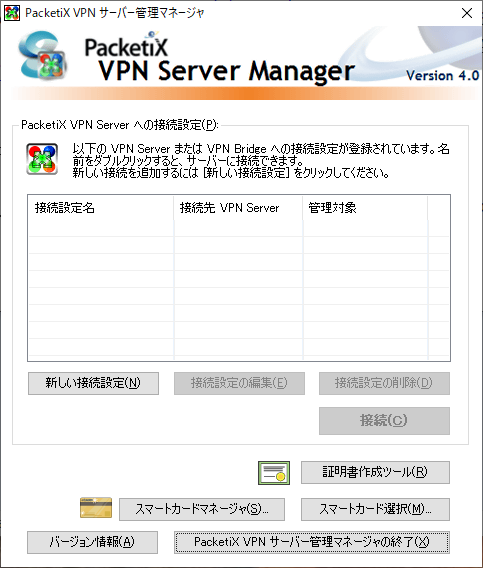
「新しい接続設定」ボタンを押します。
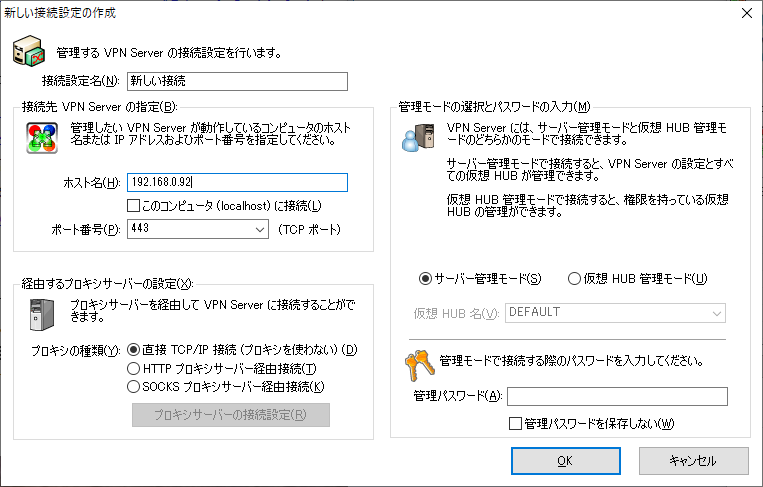
- 「ホスト名」と「ポート番号」を入力します。
先ほどインストール後には「https://172.17.0.2/」となっていましたが、これはコンテナのアドレスですので実際のホストの IPアドレスを入力します。
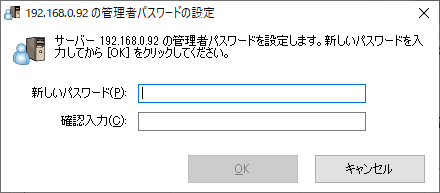
- 追加したホスト(新しい接続)をダブルクリックします。
- 最初のログインでは管理者のパスワードを設定できます。
以上