
ショコラ
Livewire で Fomantic-UI の Toast を使うには?toast
最初、アクションメソッドで処理を行った後に、プロパティやセッションにメッセージを設定して実装しようとしましたが、イベントを送って画面に表示するのが良い方法だと思いました。

もっさん先輩

手順
Laravel と Livewire をインストールして、Fomantic-UI の Toast を使う手順。
- プロジェクト名(toast)を決めて以下のコマンドを実行します。
curl -s https://laravel.build/toast | bashインストール時にプロジェクト名のディレクトリが作成されます。
- インストールの最後に sudo でパスワードの入力を求められます。
↓下のメッセージが表示されてインストールは終わります。
Use 'docker scan' to run Snyk tests against images to find vulnerabilities and learn how to fix them

Get started with: cd toast && ./vendor/bin/sail up- sail のエイリアスを定義します。
echo "alias sail='[ -f sail ] && sh sail || sh vendor/bin/sail'" >> ~/.bashrcsource ~/.bashrcLaravel のインストールはここまで。
- 「sail up」でコンテナを起動します。
cd toast && ./vendor/bin/sail up -d- ララベルのトップディレクトリで、Livewireパッケージ をインストールします。
sail composer require livewire/livewire- 次のコマンドを実行して、progressコンポーネント を生成します。
sail artisan make:livewire toast$ sail artisan make:livewire toast
COMPONENT CREATED ?
CLASS: app/Http/Livewire/Toast.php
VIEW: resources/views/livewire/toast.blade.php次の 2つ のファイルが生成されます。
<?php

namespace App\Http\Livewire;

use Livewire\Component;

class Toast extends Component
{
    public function render()
    {
        return view('livewire.toast');
    }
}
<div>
{{-- Because she competes with no one, no one can compete with her. --}}
</div>※因みに、renderメソッド を定義しなくても livewire.toast は呼び出されます。
<?php

namespace App\Http\Livewire;

use Livewire\Component;

class Toast extends Component
{
}- 生成された toastコンポーネント のクラスとビューを次のように置き換えます。
app/Http/Livewire/Toast.php
<?php
namespace App\Http\Livewire;
class Toast extends \Livewire\Component
{
  public function click1() {
    $this->emit('eval','$.toast({message:\'Post successfully updated.\'})');
  }
  public function click3() {
    $this->emit('toast',['message'=>'Post successfully updated.']);
  }
}
↑上の説明です。
click1メソッド は、JavaScript を evalイベントで送って JavaScript を実行する方法です。
click3メソッド は、settings(JSON)を toastイベント を送って toast を表示する方法です。
resources/views/livewire/toast.blade.php
<div>
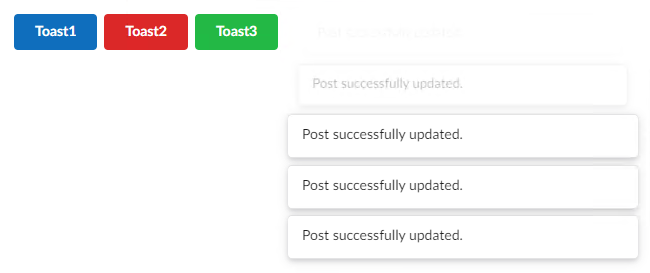
<button type="button" class="ui button blue" wire:click="click1">Toast1</button>
<button type="button" class="ui button red" wire:click="$emit('eval','\$.toast({message:\'Post successfully updated.\'})')">Toast2</button>
<button type="button" class="ui button green" wire:click="click3">Toast3</button>
</div>- resources/views/index.blade.php ファイル を作成します。
<!DOCTYPE html>
<html>
  <head>
    <meta charset="UTF-8">
    <script src="https://cdn.jsdelivr.net/npm/jquery@3.6.1/dist/jquery.min.js"></script>
    <link rel="stylesheet" href="https://cdn.jsdelivr.net/npm/fomantic-ui@2.9.0/dist/semantic.min.css">
    <script src="https://cdn.jsdelivr.net/npm/fomantic-ui@2.9.0/dist/semantic.min.js"></script>
    <livewire:styles />
  </head>
  <body>
    <div class="ui basic segment">
      <livewire:toast />
    </div>
    <livewire:scripts />
<script>
document.addEventListener('livewire:load',() => {
  Livewire.on('eval',script => eval(script))
  Livewire.on('toast',settings => $.toast(settings))
})
</script>
  </body>
</html>
↑eval と toast のイベントを Livewire.on で受信して、スクリプトを実行するようにします。
※ livewire:load が無くてもエラーにならないで動きます。
- routes/web.php に Livewireコンポーネント のルートを追加します
Route::get('/', fn() => view('index'));- ブラウザで確認します。
以上