
ショコラ
Livewire HTML 内の JavaScript から Livewireコンポーネント にイベントを送るには?liveevent2
JavaScript の Livewire.emit() でイベントを送信します。
Livewireコンポーネント外 に JavaScript を配置しているところがポイントですね。

もっさん先輩
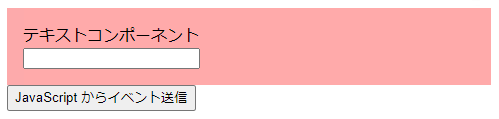
完成は↓こちらです。
手順
Laravel と Livewire をインストールして、JavaScript で イベントを送信して、ライブワイヤーコンポーネントでイベントを受信してみましょう。
- プロジェクト名(liveevent2)を決めて以下のコマンドを実行します。
curl -s https://laravel.build/liveevent2 | bashインストール時にプロジェクト名のディレクトリが作成されます。
- インストールの最後に sudo でパスワードの入力を求められます。
↓下のメッセージが表示されてインストールは終わります。
Use 'docker scan' to run Snyk tests against images to find vulnerabilities and learn how to fix them

Get started with: cd liveevent2 && ./vendor/bin/sail up- sail のエイリアスを定義します。
echo "alias sail='[ -f sail ] && sh sail || sh vendor/bin/sail'" >> ~/.bashrcsource ~/.bashrcLaravel のインストールはここまで。
- 「sail up」でコンテナを起動します。
cd liveevent2 && sail up -d- ララベルのトップディレクトリで、Livewireパッケージをインストールします。
sail composer require livewire/livewire- Livewire のクラスとビューを作成するため、ディレクトリを作成します。
mkdir app/Http/Livewire/
mkdir resources/views/livewire- ライブワイヤーのテキストコンポーネントを作成します。
app/Http/Livewire/TextComponent.php
<?php
namespace App\Http\Livewire;
class TextComponent extends \Livewire\Component
{
  public $value;
  public function render() {
    return <<<'EOS'
      <div style="padding:1em;background-color:#FAA;">
        テキストコンポーネント<br>
        <input type="text" wire:model="value">
      </div>
      EOS;
  }
  protected $listeners = ['message'=>'onMessage'];
  public function onMessage($value) {
    $this->value = $value;
  }
}- ライブワイヤーをテストするビューを作成します。
resources/views/liveevent-js.blade.php
<html>
<head>
<livewire:styles />
</head>
<body>
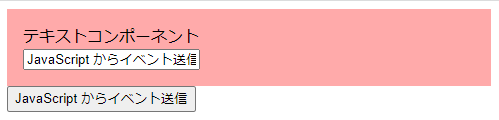
<livewire:text-component />
<button type="button"
onClick="Livewire.emit('message','JavaScript からイベント送信')">
JavaScript からイベント送信
</button>
<livewire:scripts />
</body>
</html>Livewire.emit('{イベント名}','{パラメーター}'...) - routes/web.php にルートを定義します。
Route::get('/',fn() => view('liveevent-js'));- ブラウザでアクセスしてみましょう。

「JavaScript からイベント送信」ボタンを押すと、JavaScript の Livewire.emit で messageイベント を送信し、ライブワイヤー のテキストコンポーネントで messageイベント を受信します。
※単純に、ボタンを押してテキストボックスに値を入れているわけではありません。
以上