
ショコラ
GraphQL について apollo-server版
前回は「express-graphql」を使いました。今回は「apollo-server」を使って同じことをしてみます。

もっさん先輩
GraphQL のはじめの一歩
- graphql をインストールします。
mkdir graphql-apollo
cd graphql-apollo
npm install apollo-server graphql- サンプルプログラムを作成します。
const {ApolloServer,gql} = require('apollo-server')
const server = new ApolloServer({

  // スキーマ定義
  typeDefs:gql`
    type Query {
      test: String
    }
  `,

  // リゾルバ(実装)
  resolvers:{
    Query:{
      test:() => 'Hello Answorz!'
    }
  },
})
server.listen().then(({url,subscriptionsUrl}) => {
  console.log(`Server ready at ${url}`)
  console.log(`Subscriptions ready at ${subscriptionsUrl}`)
})- graphqlサーバーを起動します。
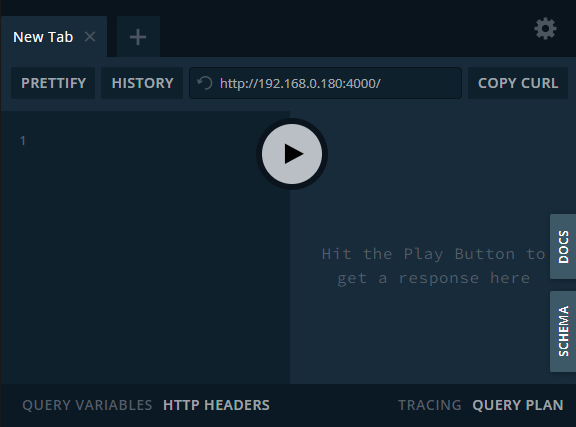
node server.js- URL にアクセスします。
ローカルホスト以外から http でアクセスすると↓以下のエラーが表示されます。ローカルホスト以外は https でアクセスしなければならないようです。
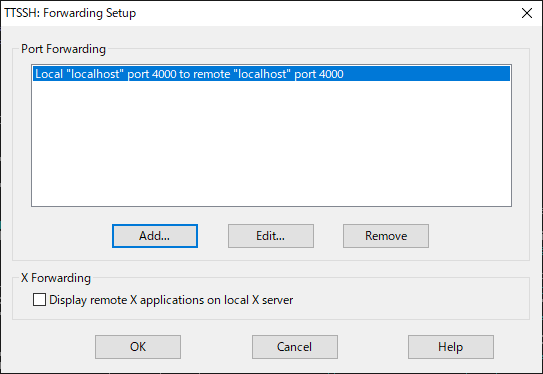
Network requests from Studio on HTTPS to your HTTP endpoint are not secure, so we cannot introspect your endpoint.TeraTerm のポートフォワーディングを使って http://localhost:4000 でアクセスすることができます。
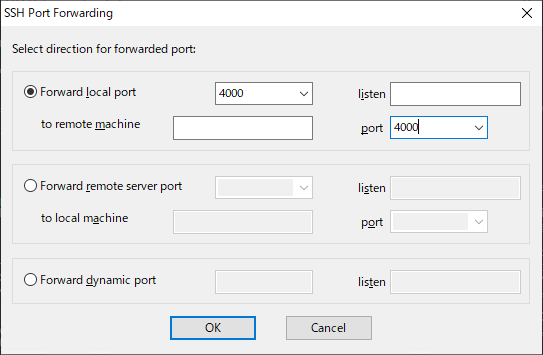
↓「OK」ボタンを押すと localhost:4000 でアクセスすることができます。
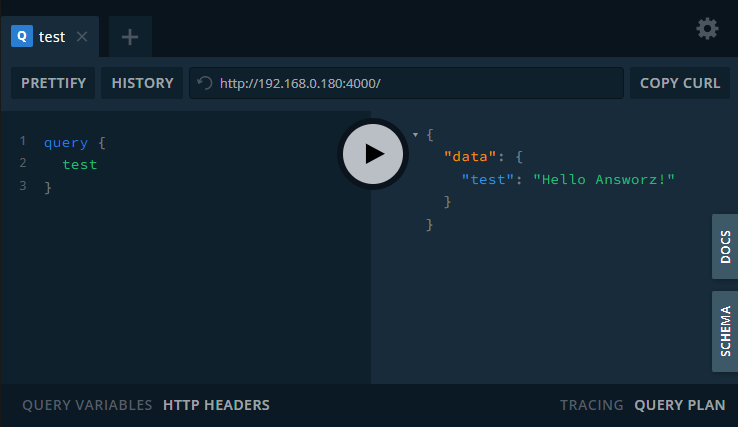
- 問い合わせます。
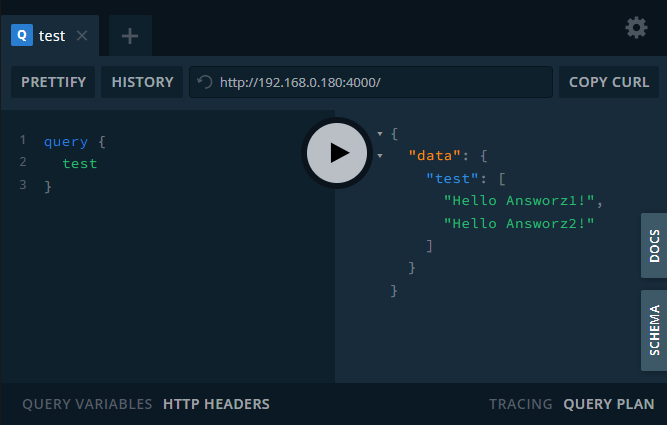
query {
  test
}
test の結果が JSON で返ってきました。
配列を使ってみる。
const {ApolloServer,gql} = require('apollo-server')
const server = new ApolloServer({

  // スキーマ定義
  typeDefs:gql`
    type Query {
      test:[String]
    }
  `,

  // リゾルバ(実装)
  resolvers:{
    Query:{
      test() => ['Hello Answorz1!','Hello Answorz2!']
    }
  },
})
server.listen().then(({url,subscriptionsUrl}) => {
  console.log(`Server ready at ${url}`)
  console.log(`Subscriptions ready at ${subscriptionsUrl}`)
})
問い合わせ方は↓こちらです。
{
  test
}
パラメーターを使ってみる。
↓パラメーターを使うポイントは、parent,args,context,info の引数から値を取得するところです。
const {ApolloServer,gql} = require('apollo-server')
const server = new ApolloServer({

  // スキーマ定義
  typeDefs:gql`
    type Query {
      test(ct:Int!):[Int]
    }
  `,

  // リゾルバ(実装)
  resolvers:{
    Query:{
      test:(parent,{ct},context,info) => {
        let result = []
        for (let i=0;i < ct;i++) {
          result.push(Math.floor(Math.random() * 100))
        }
        return result
      }
    }
  },
})
server.listen().then(({url,subscriptionsUrl}) => {
  console.log(`Server ready at ${url}`)
  console.log(`Subscriptions ready at ${subscriptionsUrl}`)
})
問い合わせ方は↓こちらです。
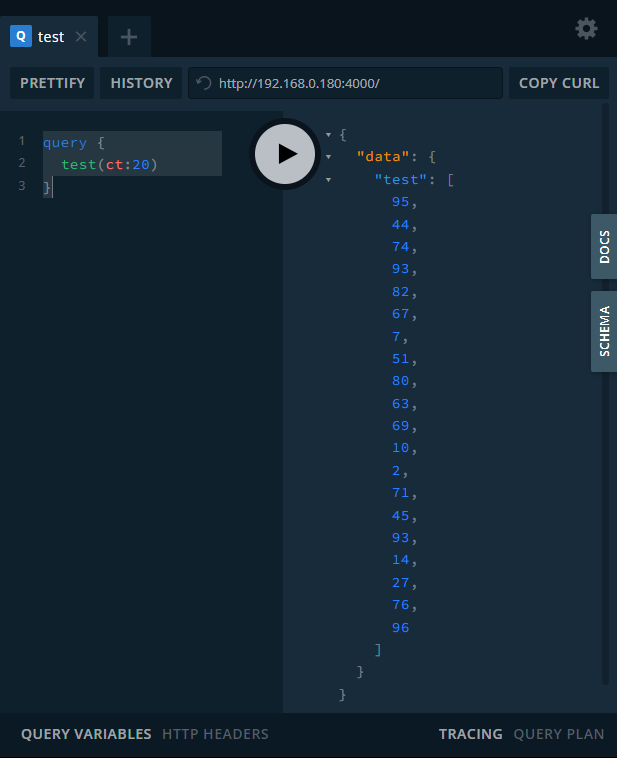
query {
  test(ct:20)
}
クラスを使ってみます。
↓リゾルバに変数を渡すには、context に登録して、context から値を取得するようにします。
class Person {
  id
  name
  age
  constructor(id,name,age) {
    this.id = id
    this.name = name
    this.age = age
  }
}

let db = {}
db[1] = new Person(1,'もっさん',40)
db[2] = new Person(2,'ショコラ',10)

const {ApolloServer,gql} = require('apollo-server')
const server = new ApolloServer({

  // スキーマ定義
  typeDefs:gql`
    type Person {
      id:ID
      name:String
      age:Int
    }
    type Query {
      getPerson(id:ID!):Person
    }
  `,

  // リゾルバ(実装)
  resolvers:{
    Query:{
      getPerson:(parent,args,{db},info) => db[args.id]
    }
  },

  context:{
    db
  }
})
server.listen().then(({url,subscriptionsUrl}) => {
  console.log(`Server ready at ${url}`)
  console.log(`Subscriptions ready at ${subscriptionsUrl}`)
})
問い合わせをする場合、↓下のように取得するフィールドを指定します。カンマ必要無し。
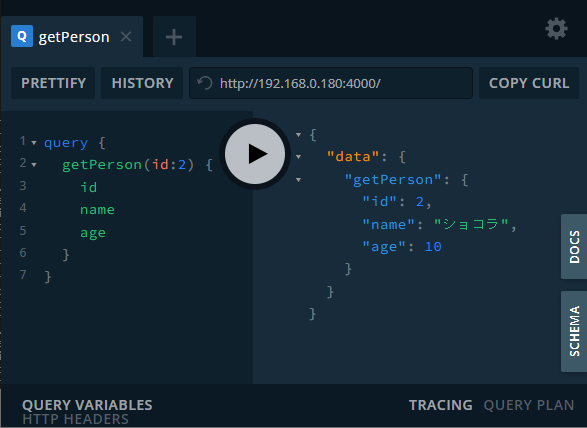
query {
  getPerson(id:2) {
    id
    name
    age
  }
}
データを登録してみる。
この場合使うのが「type Mutation」です。
class Person {
  id
  name
  age
  constructor(id,name,age) {
    this.id = id
    this.name = name
    this.age = age
  }
}

let db = {}

const {ApolloServer,gql} = require('apollo-server')
const server = new ApolloServer({

  // スキーマ定義
  typeDefs:gql`
    type Person {
      id:ID
      name:String
      age:Int
    }
    type Query {
      getPerson(id:ID!):Person
    }
    type Mutation {
      createPerson(id:ID!,name:String!,age:Int!): Person
      updatePerson(id:ID!,name:String!,age:Int!): Person
    }
  `,

  // リゾルバ(実装)
  resolvers:{
    Query:{
      getPerson:(parent,{id},{db},info) => db[id],
    },
    Mutation:{
      createPerson:(parent,{id,name,age},{db},info) => db[id] = new Person(id,name,age),
      updatePerson:(parent,{id,name,age},{db},info) => db[id] = new Person(id,name,age),
    }
  },

  context:{
    db
  }
})
server.listen().then(({url,subscriptionsUrl}) => {
  console.log(`Server ready at ${url}`)
  console.log(`Subscriptions ready at ${subscriptionsUrl}`)
})
Mutation で登録します。
mutation {
  createPerson(id:1,name:"もっさん",age:40) {
    id
    name
    age
  }
}
mutation {
createPerson(id:2,name:"ショコラ",age:10) {
id
name
age
}
}問い合わせをしてみます。
query {
  getPerson(id:1) {
    id
    name
    age
  }
}
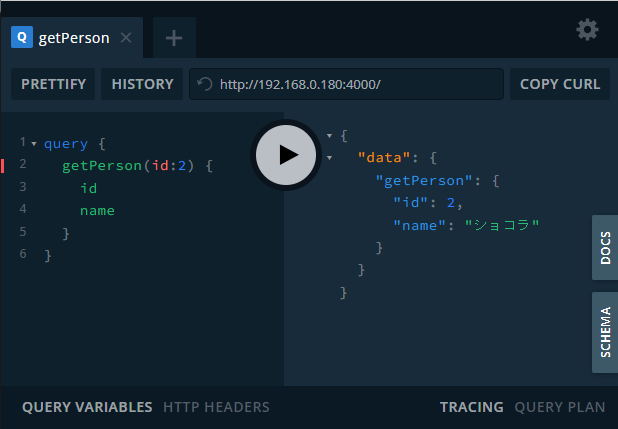
query {
  getPerson(id:2) {
    id
    name
  }
}
データをクラスで登録してみる。
↓クラスでデータを登録するとき定義で使うのが input。PersonInput に注目です。
class Person {
  id
  name
  age
  constructor(id,name,age) {
    this.id = id
    this.name = name
    this.age = age
  }
}

let db = {}

const {ApolloServer,gql} = require('apollo-server')
const server = new ApolloServer({

  // スキーマ定義
  typeDefs:gql`
    type Person {
      id:ID
      name:String
      age:Int
    }
    input PersonInput {
      id:ID
      name:String
      age:Int
    }
    type Query {
      getPerson(id:ID!):Person
    }
    type Mutation {
      createPerson(input:PersonInput): Person
      updatePerson(input:PersonInput): Person
    }
  `,

  // リゾルバ(実装)
  resolvers:{
    Query:{
      getPerson:(parent,{id},{db},info) => db[id],
    },
    Mutation:{
      createPerson:(parent,{input},{db},info) => db[input.id] = input,
      updatePerson:(parent,{input},{db},info) => db[input.id] = input,
    }
  },

  context:{
    db
  }
})
server.listen().then(({url,subscriptionsUrl}) => {
  console.log(`Server ready at ${url}`)
  console.log(`Subscriptions ready at ${subscriptionsUrl}`)
})
Mutation で登録します。
mutation {
  createPerson(input:{
    id:1
    name:"もっさん"
    age:40
  }) {
    id
    name
    age
  }
}
mutation {
createPerson(input:{
id:2
name:"ショコラ"
age:10
}) {
id
name
age
}
}変数を使って登録してみます。
mutation ($input:PersonInput!) {
  createPerson(input:$input) {
    id
    name
    age
  }
}
{
"input":{
"id":3,
"name":"ナイスガイ",
"age":20
}
}今回は変数を使って問い合わせをしてみます。
query ($id:ID!) {
  getPerson(id:$id) {
    id
    name
  }
}
{"id":1}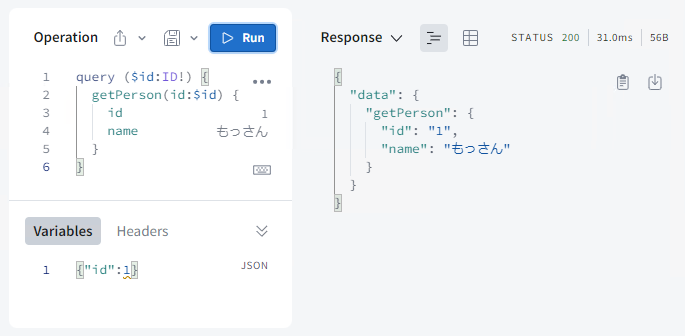
以上